Showing posts with label FREE Craft Projects. Show all posts

Sunday, July 06, 2008

July 2008 Issue


In this great issue we have 3 NEW E-Patterns, TONS Of Recipes
some with YUMMY photos, we have photos of Laurie's Fair Time Edition,
Scrapbook Layout Pattern, We also have great BUSINESS articles on the NEW Wave
of blogging called Entrecard, plus Business Tips with Denise and more! This is
our largest issue yet with OVER 71 PAGES!!!!!!! 


Click
here
to download our PDF format Version OR


Click here to view our Magazine ONLINE


Remember we are accepting ads for our August
issue which are currently HALF OFF for the next three days! So get your ad
NOW 

Saturday, June 07, 2008

Some FREEBIE E-Patterns

These are Free E-Patterns
©Denise Bailey KKL Primitives
Click on Photos to Download Files
Files are in pdf format, you will need Adobe Reader to open them.
http://www.adobe.com/products/reader/
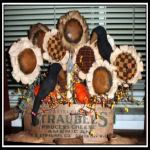
Prim Fabric Sunflowers Tutorial
This tut is for sunflowers only. Directions for making box light are not included. Photo is for display purpose only.


Wooly Sheep Ornie Hanger


Fabric Scrap Prim Easter Eggs

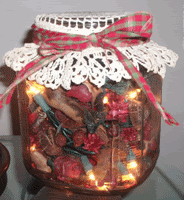
Lighted Jar Lamp


Lighted Jar Lamp

By Denise Bailey

Supplies Needed

cracker jar or similar sized jar

1 set of 35 clear mini-lights

bag of potpourri

rosehips

crocheted or lace doily approx. 15 inches round

large rubber band

1/2 inch wide strip of homespun, 36 inches long

power drill

diamond drill bit

spray bottle of water


To make this lighted jar lamp, I had my husband drill a hole through a large cracker jar that I picked up at a fleamarket for $2.00

To drill a hole through glass, you should always first protect your eyes by wearing some kind of eye protection, like goggles.


You will need a power drill and diamond drill bit. As you are drilling, you must keep the area damp. The reason for this is that grinding glass creates a lot of heat. You need to keep the area that you are drilling wet/lubricated. You can use a turkey baster filled with water or spray bottle of water.


Place a piece of masking tape over the area where you want your hole. Do not place it too close to the bottom of your jar. Place a heavy towel under your jar to cushion it.

When drilling, go very slow and apply light pressure. Your hole only needs to be large enough to fit the wires of your mini-lights through.


After hole is drilled, you will need to remove the plug from the wires so that the wires can be fed through the hole from the inside of the jar. My husband usually just cuts the plug off and replaces it with a new one after he's fed it through the hole.


Here are some instructions on how to replace plugs.

http://www.ehow.com/how_2104146_replace-electric-plug.html

Make sure that the mini-lights are 'loose' in the jar, don't pack it down. Place handfuls of potpourri and rosehips in the jar, shake the jar so that they fall to the bottom, in and around the lights. fill to the top of jar. Don't pack, keep it loose so that your lights will shine through when plugged in.

Cover jar with doily, secure with rubber band. Tie homespun around neck of jar to cover rubber band.


These make excellent gifts and be sure to keep one for yourself!

www.kklprimitives.com


http://theoldecarriagehouse.com/Vendors/sites/AlleghenyPrimitives/

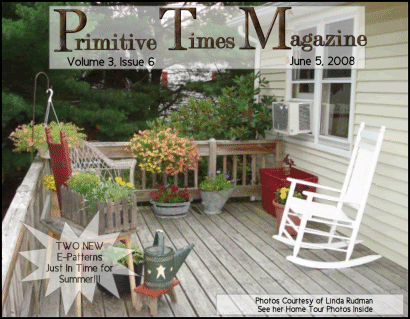
Primitive TImes Magazine June 2008 Issue


We have TOTALLY Redesigned our Magazine!
Not only does it look Beautiful! But it has GREAT content too! We are taking ads
for our July issue and we have already filled half of our spots so please please
get your ads in asap! With your July Ad you can include a FREE coupon PLUS get a
Full page on our site with up to 9 product photos if you purchase a 1/4 ad or
larger! So click here to reserve your spot in our beautiful NEW Magazine!
Click here to reserve your Spot today!


Also if you like our magazine and enjoy
it every month consider making a donation to help offset the cost of production!
Just click the button below and donate ANY Amount you want! Thank you


Inside our June Edition


There are TWO Great E-Patterns


A 10 Page Home Tour with wonderful photos


Pages Filled Yummy Recipes


WAHM and Primitive Crafter Business
Advice


Featured Crafter- Kristie Norman


Spotlight Ads


And Sooo much more!


Click to download our
latest edition HERE


Help Promote
Primitive Times Magazine by adding our graphic below to your site and linking it
back to Primitive Times Magazine just click the code in the box and you are all
set!


<a href="http://www.primitivetimesmagazine.com"><img src="http://i162.photobucket.com/albums/t279/primtalk/NEw/PTMmagazinedownload.gif">

Wednesday, April 02, 2008

Tea Staining Fabric

Tea Staining Fabric


Tea staining has been around a long time and was first used to
hide stains on linens. It is one of the most popular ways to
stain fabric and gives it a warm antique look. Different types
of teas such a green tea, black tea, rasperry and herbel teas
will give you different tints and tones on fabrics so don't be
afraid to experiment a bit. Hibiscus tea will give you red tones
while black teas give more of a soft brown or cream tone to the
fabric. Tea staining works well only on natural fabrics- muslin,
cotton, linen and wools dye well. It is very easy to do and just
takes a few simple steps


If you
fabric is new be sure to wash it first to remove the sizing
before dying.I have found 4 cups of water and 4 single cup tea
bags will dye one yard of fabric.


Bring the water to a boil and remove from heat add tea and let
set for about 5 minutes until the liquid turns the desired
color. Remove the tea bags from the water if you dont the tea
bags may make dark stains on your fabric


Wet the fabric in water thoroughly, removing excess before
putting in the tea mixture- stir gently


Let soak for about 10 minutes checking to see if the fabric is
dark enough. Remember you fabric will dry a shade lighter.


When fabric has reached the desired color remove from the tea
mixture and rinse well with warm water and a mild dish soap- if
you don"t the fabric may become damaged by the tea- tea contains
acid which can destroy fibers over time


Line dry or place the fabric in the dryer. I like to put the
fabric in an old pillowcase to protect my dryer and if Im going
to put in white clothes right after I will wipe the dryer out if
it jeans I just don't worry


When the fabric is dry if you want it darker repeat the process
, if the fabric is too dark wash the fabric in a gallon of water
to which you have added 1 tablespoon of bleach this will lighten
the fabric- rinse thoroughly and redry


If I am going to use the fabric for something that is going to
be washed I will soak it in a gallon of cold water to which I
have added 1 tablespoon of vinegar to set the color.


Have fun tea
staining - remember the possibilities are endless -old linens,
clothes, etc can all be tea stained

!


Rusting Items By Debbie

Rusting Items
by Debbie

This recipe
will nicely rust safety pins, jingle bells, or anything else you
want 'age' for your primitive creations. The most important
thing to remember about rusting, is that you will want to buy
the cheap brand of pins, bells ...etc that you can find. The
more expensive brands have a shellac coating on them that you
will have to sand off before rusting. Makes sure they are NOT
brass either-brass will not rust. Do this outside away from
children and pets... and fumes are terrible!


Ingredients:


1/2 cup cider
vinegar

1/2 cup bleach


1 teaspoon salt


Directions:


Combine the
ingredients in an old quart jar.


Add items you
want to rust and cover loosely-place in a safe spot and let set
for at least 2 days.


Line a tray
with a couple of layers of paper towels and remove the items
with an old fork from the mixture. Place in the sunshine... the
items will begin to rust as they dry. Move them around so that
they dry on all sides.


Perfectly
rusted bells, pins, and any other item you wish to rust.


CAUTION: Do not
throw the mixture down the sink- dispose of properly where no
animal or child could come in contact with.


Written by Debbie Hainline- Two
Old Crows (
www.2oldcrows.com)


If you fabric is new be sure to wash it first to remove the
sizing before dying.I have found 4 cups of water and 4 single
cup tea bags will dye one yard of fabric.


Bring the water to a boil and remove from heat add tea and let
set for about 5 minutes until the liquid turns the desired
color. Remove the tea bags from the water if you dont the tea
bags may make dark stains on your fabric


Wet the fabric in water thoroughly, removing excess before
putting in the tea mixture- stir gently


Let soak for about 10 minutes checking to see if the fabric is
dark enough. Remember you fabric will dry a shade lighter.


When fabric has reached the desired color remove from the tea
mixture and rinse well with warm water and a mild dish soap- if
you don"t the fabric may become damaged by the tea- tea contains
acid which can destroy fibers over time


Line dry or place the fabric in the dryer. I like to put the
fabric in an old pillowcase to protect my dryer and if Im going
to put in white clothes right after I will wipe the dryer out if
it jeans I just don't worry


When the fabric is dry if you want it darker repeat the process
, if the fabric is too dark wash the fabric in a gallon of water
to which you have added 1 tablespoon of bleach this will lighten
the fabric- rinse thoroughly and redry


If I am going to use the fabric for something that is going to
be washed I will soak it in a gallon of cold water to which I
have added 1 tablespoon of vinegar to set the color.


Have
fun tea staining - remember the possibilities are endless -old
linens, clothes, etc can all be tea stained !


Debbie
owns "Two Old Crows" (www.2oldcrows.com) where she sells her
handpainted folk art and other handcrafted items she makes along
with antiques, primitives and vintage collectibles


February Issue of Primitive Times Magazine


February Issue Click Here to Download


Inside this edition you will see our


Meet the Editors,


A Fibre Arts Book Review,
A Farm Story,

A Primitive Lamb Sampler,


A Lam b E pattern,


Using Beeswax on
your Paintings,

Valentines Paper Crafts,


Bonny Bunny Pattern and Instructions,
Tons of great recipes,

Analyzing Website Traffic Article,


Goal Setting for the
new year,

Good Versus Bad Web Design,


and Are you afraid of pattern making
amongest Many other great articles!

Click on the link above or the magazine
cover to download your issue today!

Old Fashioned Soap Balls


Old fashion soap balls can be created
easily using either ivory or dove soap bars, they have the look
and feel of old soap. For a more grungy looking soap ball roll
them in spices such as cinnamon before they are completely set
up (Caution do not use if you do this your skin may have
allergic reaction to the spices- display only)


Ingredients:
1 cup of instant Quaker oatmeal
1 bar of ivory or dove soap
1/4 cup of water


Grind up the oatmeal in a food processor until finely milled but
do not grind to flour you want it chopped up enough to break up
the oatmeal flakes but still be visible


Grate the bar of soap into small slivers
Place the soap and water into a large microwavable bowl and
microwave on high for 2-3 minutes. Stir the mixture once or
twice making sure it does not bubble over


When the soap is dissolved remove from the microwave and add the
ground oatmeal slowly stirring constantly


Let cool enough to touch then form into balls placing on wax
paper to set and dry. It will take about 2 hours for them to
set.


Oatmeal soap balls have a great
old fashion look and can be displayed in old soap dishes,
vintage jars, wooden bowls and baskets in primitive or country
bathrooms or kitchens.


Debbie
owns "Two Old Crows" (www.2oldcrows.com) where she sells her
handpainted folk art and other handcrafted items she makes along
with antiques, primitives and vintage collectibles


Sweet Potato Garland

Sweet potato garland is a wonderful accent to primitive or country decor. Stringed sweet potato garland is perfect for hanging on a primitive tree or as garland on a fire place or doorway. I don’t suggest putting it outside unless you don’t mind the varmit and birds eating it.

Supplies:
Sweet potatoes ( you can use regular potatoes)
Instant coffee
Spices- nutmeg, ginger and cinnamon
Cotton string
Needle


First make your coffee staining mixture
3 heaping tablespoons of instant coffee (I have found that the more expensive coffee gives a deeper stain)
1 cup of boiling water
Mix the two and let steep for a few minutes


Stain your piece of cotton string with this mixture by dipping it in and letting it dry ( I would not do a garland more than 6 feet long) dry this completely.

Do not peel the potatoes but just cut into 1 inch cubes

Mix equal amounts of your spices together in a pie pan

Soak the cubes of potatoes in the coffee mixture then roll them in the spices covering thoroughly ( I like to roll them all once and then roll again)

Tightly string the cubes together because they will shrink while drying

You can let these air dry or place in a 150 degree on a cookie sheet. Be sure to keep checking and scrunching them together as they dry to prevent gaps. ( Have found they are impossible to move on the string after drying)

These are a wonderful addition for fall decorating


Microwave Hang Tags:


Microwave Hang Tags:
A recipe for grubby hang tabs. It works great, and you don't
need to turn oven on.
2 cups of hot water
1/4 cup instant coffee (dry)
2-3 tea bags (let seep for a bit)
3 Tablespoons imitation vanilla
scented oil is optional and amount depends on strength
desired.
Mix together. Soak tags in coffee mixture for 5-10 mins. Lay
on paper plate lined with paper towels. Microwave in
intervals of 40 sec, checking to make sure they don't burn.
Sprinkled lightly with real cinnamon before microwaving. You
can stamp on them or write on them. A really great look is
old time pictures applied with decoupage. Add pic of your
kids to the hang tags and use as gift tags.


Kids tip: Let the kids
personalize them and they can give for Valentines, Mother's
Day, Father's Day, Grandparents Day or for any special
event.


This recipe can be used to stain muslin also, apply with
sponge brush. Sprinkle the wet muslin with cinnamon and rub
for a great grubby look. Air dry the fabric.


~~~~~~~~~~~~~~~~~~~~~~~~~~~~~~~~~~~~~~~~~~~~~


Let's get grungy!! Tea bag trick! I want to share this
quick tip with you. Do you have lampshades that need that
fast prim touch? Take a few tea bags (may need more ready
depending on the size of the shade) Throw a cup of water in
the microwave on high to get nice and hot, let your tea bags
steep and gently wring out a little to get excess water
off. Simply dab or blot your tea bags directly onto your
shade! Yes, it's that simple. You can do as many layers as
you'd like depending on how dark you want your stain.


Friday, August 17, 2007

Easy Fall Decorating Ideas

Easy Fall Decorating Ideas

Welcome Prim Talk Listeners to another great week of wonderful crafting tips and creations! Today I wanted to share some fun and easy tips for decorating your home for the Fall Season! These are super easy and fun crafting ideas that you can do in your spare time or on a lazy weekend.

Fall Candle Decorating

A Treenware Bowl or Prim Bowl
Votive Candles in Fall Scents like Pumpkin or Ginger
Popcorn Kernels in assorted colors
Small mixed nuts and berries
Pine cones and Pine Needles
Essential Oil in a Fall Scent
For a Halloween Decoration you can Use Candy Corn

Simply fill a deep bowl with an assortment of nuts, berries, popcorn kernels, pine cones, pine needles or even fall dried flowers. Next add an assortment of Fall Scented Candles into your bowl. You can use clear glass candle holders if choose or leave your candles floating in your Fall Mixture. Next add a few drops of your favorite essential oils in the fall mixture to add wonderful aroma and scent throughout your house. This is super simple decorating idea and you can even change your fall mixture to a candy corn mixture to adapt your candle decoration to blend into the Halloween season.

With Apple Picking Season Fast upon us I thought I would share some easy Apple Craft Recipes I shared the Apple Wreath last year and I will touch base on this again. Apples are not only a wonderful edition to your Fall Menu planning but they can add a wonderful and beautiful touch to your home décor also.

Simple Apple Potpourri
Lemon Juice
Apple Slices
Cinnamon Ground
Cinnamon Sticks

Cut 8-10 Medium Apples into slices leaving the seeds in tack. Next pour Lemon Juice over your apples in a bowl, allow them to soak in the Lemon Juice for about 5-10 minutes and then layout on paper towls to dry. Next in a bowl coat well with ground cinnamon and you can even use a little sugar to give your apples a wonderful aroma then place them onto a cookie sheet and place in your oven at 200 degrees for 5 minutes to speed up the drying process. Next just add your apples slices to a Treenware or Primitive bowl and you can add cinnamon sticks for decorations and even dried flowers to add a little contrasting color.

Apple Wreath
Lemon Juice
Apple Slices
Heavy Gauge Wire
Pliers
Cinnamon Ground
Gingham Fabric

Prepare your apple slices are you did above slicing them and baking them in the oven. Now just add your slices to your Heavy Gauge Wire and fill up your wire to the desired length you are looking for. Then using your pliers fasten the ends of your wire together and you can share and bend your wire into either a circle or heart shape. Next using your gingham fabric you can either fill in gaps with bows or add a hanger for your wreath by using gingham ribbon on the top of your wreath! Now you have beautiful and fun and easy to make wreath that will leave a wonderful aroma of Apples and Cinnamon throughout the Fall Season.

Another easy adaption to the apple wreath that my daughters and I did last year was to simply make apple garland by stringing your apple slices onto the wire then adding gingham bows through the wire. We also added cinnamon sticks for a decorative flair and then I hung this from my fireplace. It made a beautiful garland and was so inexpensive to make and my kids had a blast helping me create these. Remember not only are apples yummy and wonderful in apple pies but by using a little creativity and items you have around your home they can become a wonderful craft projects also!

Friday, July 20, 2007

Prim Talk Radio Show #66


Today’s Show:


  • Angie

    host of


    Heartland Graphics


    will be sharing a segment on how to sell on Ebay for the Holiday Season this
    is Part 2


  • We have a Featured Crafter Interview
    today with Michele from


    Holly Tree Primitives
    we encourage you to
    click on her banner below and visit her great NEW site today!


  • Michelle Lammers


    from

    Scrappin with Army Wife


    talks trying to find time to spend with
    your kids, some alone time for yourself and some alone time with your husband.


  • Mary
    Jo Elliott our newest staff member from


    Fine Country Living Primitives


    talks to you using Pip Berry Vines and Wreaths in your prim decorating, she
    also has a wonderful summertime recipe she will be sharing with everyone!


  • Heather our newest staff member from

    Cotton
    Pickin Prims
    is here talk to us about getting your booth ready for
    the upcoming Fall Craft Shows


  • Grab
    our

    Advertising Special 6 months


    of Front Page advertising plus mention on every show for 50% off normal prices
    the total is only $50 for six months!


    Click here
    to order!


Click below to listen to our show
OR
Click here to visit our site


Friday, May 11, 2007

WHAT'S NEW On Our Editors Pages

Our editors are always adding NEW content to their pages of our Primitive Times Magazine website. Since we wouldn't want you to miss anything NEW we decided that we'd tell you about the NEW content that is added to our editors pages each month on our Primitive Times Magazine Blog. That way you'll always know what's NEW.

This month we have quite a few NEW articles on the editors pages of our Primitive Times Magazine website that we thought you might like to know about.

Here's what's new:


Neenee's Nook

Basically, Neenee's whole page is brand new and she has already added 2 great crafting articles that prim lovers are sure to enjoy. Plus, Neenee is a terrific graphics artist and she has added some of her wonderful FREE graphics including dolls, bears, fairies, mammies, sheep, angels and more.

Free Stick Horse Pattern by Neenee
Handmade Potpourri
FREE Graphics From Neenee
Boiling Ham and Cabbage Recipe
FREE Doll, Bear, & Fairy Graphics From Neenee - NEW
Making a Candle Jar - NEW


From The Crow's Nest by Debbie


Debbie has two great articles for prim crafters.

Tea Staining Fabric NEW
Rusting Items NEW


Dear Linda

If you like learning the history of certain items be sure to checkout Linda's latest article on the history of faceless dolls. If you like dolls and history you'll love reading this article and the other articles on Linda's "Dear Linda" page.

The History of Faceless Dolls-NEW


Prim Business Articles by Angie


Angie added another great business article on website how-to's.

Website How-To's - NEW


There's a ton of information on all our editors pages. We have everything from Free Graphics, Free Patterns, Recipes, Craft Projects, Business Tips, Craft Tips, Historical Articles, Advice for WAHM's, How-To's, Prim Crafting Tips, and so much more.

We hope you get a chance to stop by our Primitive Times Magazine website and read the latest from our editor's pages.


Copyright © 2007 - All Rights Reserved - Written Linda Walsh of Linda Walsh Originals, Linda Walsh Originals E-Patterns,Linda Walsh Originals DOLLS NEW Handmade Dolls & Crafts Website, Linda Walsh Originals Dolls and Linda's Blog. Linda is a doll maker and doll pattern designer. http://lindawalshoriginals.com

Saturday, May 05, 2007

May 2007 Issue of Primitive Times Magazine


The May 2007 FREE Primitive Times Magazine E-Issue was just released and it is a "MUST READ!" It is filled to the brim with FREE craft articles for Mothers Day!. You definitely don't want to miss it.

You can now read your copy of the FREE May 2007 issue of Primitive Times Magazine two ways. It is available as either a
FREE .pdf e-zine issue
for you to download and or you can order a copy by mail!.

Whichever way you decide to read it Primitive Times Magazine May 2007 issue is filled to the brim with 33 pages of terrific information for crafters, small business, and website owners.

Just look at what's included:


FREE Stitchery Patterns

  • Spring Cleaning Life's A Bleach by Neenee
  • A Love of Art Brings Peace by
    Linda Walsh

  • How to Design a Print Pattern and E-Pattern by Linda Walsh

  • Fathers Day by Neenee

  • Website Spring Cleaning from a Consumers Point of View by Nancie

  • Increasing Your Sales with Craft Fairs by Brenda

  • Making Lye Soap with Milk by Wanda

  • Covering Lamp Shades by Wanda

  • 14 Ways to Show Kids You Love them by Joan Brochu

  • Bananas Home Remedies by Joan Brochu

  • Recipe Corner

  • Practical Aromatheraphy by Lauren Sorgaard

  • Uses for Corn Starch by Joan Brochu

  • Do you have a Disaster Plan for your Business by Lisa Lowell

  • Business Success with Niki Jackson

  • An Empty Thread and Bath Time Fun by Lisa Lowell

  • Making A Prim Candle Mat by Dianne

  • Web Directory Ads

  • E-Pattern Showcase Ads

  • Ode to Mothers by Renae

  • Recipe Corner #2

  • Featured Crafter for May

  • Holly Tree Primitives

  • Mulled Spice Bags by Angie Wenke

  • Cute Button Candles by Angie Wenke

  • Product Reviews


  • So grab your FREE May 2007 issue of Primitive Times Magazine.
    CLICK to Download the FREE .pdf e-zine issue
    .


    Copyright © 2007 - All Rights Reserved - Written By Angela Wenke of Prim Talk Radio, Heartland Marketplace, Primitive
    Times Magazine
    , Heartland Graphics

    Saturday, April 14, 2007

    *Free* Stick Horse Pattern

    To make this prim stick horse, download the pattern below by clicking on the link. This size stick horse is for using with dolls or can be used as large ornies.

    click here to save Pattern


    Materials needed:
    muslin fabric
    *Coffee Stain
    jute string
    2 rusty bells
    black embroidery floss
    thin tree branch - approx. 8" long ( can substitute dowel rod )
    paint brush
    sewing needle
    *Coffee Stain Mixture
    1 cup hot water
    4 T. instant coffee
    2 T. vanilla
    1/4 cup ground cinnamon


    Stir well and let this set while you cut and sew your pattern. You want the cinnamon to settle at the bottom of your bowl.


    Directions:
    Trace pattern onto muslin. The outline is the sewing line so be sure to leave at least an inch around the horse when cutting out to sew. Sew only to the small x's on the bottom of the pattern, leaving the bottom open for stuffing. You will not be sewing this closed. Trim to within a 1/4 inch of the seam and clip where needed.


    Stuff horse with polyester fiberfill til firm. Stuff only to broken line indicated on pattern.


    Stitch the eye with 6 strands of black floss.


    Wrap jute string around muzzle and neck several times to thickness desired for the harness.


    Attach two rusty bells as shown in pattern.


    Place horse head over your stick/branch and with the jute string, wrap firmly beginning at the dotted line. Wrap about 10 times and tie off.


    With your paint brush, brush the coffee mixture over the horses head and jute strings.


    Place in warm oven ( not higher than 200) until the head is dry. Turn over every few minutes.


    Thread your needle with 6 strands of black floss. Beginning in front of horse's ear, attach the 'hair' for the mane. Clip to desired length. Continue down the back of the horse's neck to the wound jute.


    With your paint brush, again paint the horse with the coffee mixture, this time wiping the bottom of the bowl with the brush to pick up some cinnamon. This will give you the 'dirty' or grungy look to your horse, brush over the mane too. When completely dried, the mane will be stiff.


    Place horse stick back in oven and dry. Turn over every few minutes.


    Terms Of Use
    You may not offer this pattern for download, instead, you may link to it. Do not sell this pattern. The copyright belongs to me and I'm offering it for free, it should stay that way.
    You may sell your completed project in craft shows only. If you sell, please give credit to me as the designer. (©KKL Primitives) Thank you.


    technorati tags: , , , , , , , , , , , , , , , , ,


    Posted by: Neenee
    KKL Primitives
    The Krazy Kraft Lady Blog
    KKL Graphics Blog
    KKL Kreations Blog
    Menopausal Monster Blog
    contributing editor for:
    Primitive Times Magazine a free downloadable magazine for crafters
    Primitive Times Magazine Blog

    Wednesday, March 14, 2007

    Easter egg Decorating Fun by Angela Wenke


    Easter egg Decorating Fun by Angela Wenke

    Easter is such a wonderful time of the year, with all the beautiful flowers in bloom, families coming together to celebrate the holiday that I thought I would share some fun, and creative egg decorating ideas. All of these techniques can be used whether you are working alone or with the help of your children. So sit back enjoy a cup of coffee and enjoy these fun and wonderfully easy Easter egg Techniques.

    Masking Tape Eggs


    Materials:


    *Hard Boiled Eggs (dried and cooled)

    *Masking Tape

    *Craft Knife

    *Food Coloring or Egg Dye

    *Push Pins

    *Cardboard Pieces

    *Paper Towels

    *Spoon

    *Plastic Gloves (optional)

    Steps:

    1. Start by boiling your eggs and then allow them to cool and dry completely before starting your project.
    2. While your eggs are cooling and drying you can make egg stands for our eggs to dry on, by simply folding pieces of cardboard into a triangle shape and securing with push pins. Make sure to test your egg stands by placing an egg on top, to make sure your egg stand can with stand the weight of the egg.
    3. Now place your egg into your first color choice, it is usually best to dye your egg at this point in the lighter of the two shades. As this will be the shade that will show once we remove our masking tape. Now allow to dry.
    4. Now we are ready for our second color. Next, simply cut different widths of masking tape approximately 10 inches in length using your craft knife. You can even cut curves into your masking tape or different shapes to add a unique feel to your eggs. Try to keep your tape no wider than ¼ inch to keep a uniformed look on your egg.
    5. Now choose which colors you will be using on your egg, it is best to keep it simply with just two colors until you become more experienced.
    6. Next, apply your strips to your egg, you can use any design you want. Such as having a center point at the top of your egg that all your strips start from, or be creative and use a plaid design. Your imagination has no bounds in this creative project.
    7. Once you have applied all the strips of masking tape to your egg, simply dip into the dye mixture. You may want to dip several times to achieve a uniform color and richness of color. Then simply tap dry with a paper towel and place on top of our egg stands to dry.
    8. Once your egg is completely dry, carefully remove your masking tape one strip at a time.
    9. Your egg is complete! Now if you would like to add a professional touch and make your egg stand out by adding a gloss to your egg you will want to use polyurethane. Simply dip your finger into the polyurethane with your gloved hand, and spread it around your egg. Be gentle as to not crack your egg, and be sure your egg is completely covered and place back onto the egg stand to dry.
    10. At this point you could also add a second coat of polyurethane to insure an even coating and higher gloss. And that is it your egg is complete!

    Easy Techniques for Decorating:

    There are many fun ways to add some texture or a different design to your normal colored Easter eggs. Inside this article I will share some fun and easy tips.

    Bubble Packaging Eggs:

    Take a hard boiled egg uncolored and let’s add some paint the fun way! Simply take bubble wrap and paint onto your bubble wrap some acrylic paint in color of your choice, now simply roll your egg over the bubble wrap for a fun and creative texture on your egg. You add stripes of different colors or make a tie die effect. This is super simple and it leaves a wonderfully unique design.

    Thumbprint Eggs:

    This is a fun one for the kids, allow the kids to apply thumbprints in different colors of acrylic paint. This can create a mosaic look to your eggs this year.

    Dripped On Eggs:

    Take a colored Easter egg and let’s add some fun to our design. Simply take a paint brush dipped in acrylic paint and drip streams of paint or dots of paint all over your egg. This will give your eggs a unique retro design that will be sure to impress.


    Light Bulb Sleeve Eggs:

    The Sleeves that protect your light bulbs have wonderful ridges that are so much fun to decorate your eggs with. Simply open your sleeve and lay it flat to expose the bumpy ridges and cover in acrylic paint of your choice, and roll your egg over the ridges. This makes a wonderful fence design if you would like to paint a spring garden.

    I hope you have enjoyed these super easy ideas for adding a bit of fun and spice to your ordinary Easter eggs this season.

    Author:

    Angie Wenke is the owner-designer of Heartland Graphics and Heartland Marketplace.

    "I started in the craft community by offering crafts of my own I started selling gift baskets and some handmade unique crafts of my own. That is how I met such wonderful crafters, then I started my first site Heartland Marketplace which has been a huge success! Then I started created graphics which has been my true passion and I started Heartland Graphics!"

    http://www.heartlandgraphics.org

    To find more great articles like these please visit
    Primitive World Magazine

    Tuesday, March 06, 2007

    Gourd Bird House or Bird Feeder


    Gourd Bird Houses and Bird Feeders are a great way to take your natural resources and make something fun and creative! Here is a simple idea to create a great looking Bird House or Bird Feeder.

    1.Drill gourd. Use a craft knife, razor knife, or hole-saw attachment for your drill to create the openings for birds. One hole makes it a birdhouse. Four holes make it a bird feeder

    2. Add perches. To make a spot for perches, drill a hole the diameter of a wooden rod or peg under each bird entry.

    3. Finish. Apply glue to the lip of the perch hole and insert the pegs into the holes. More glue can be applied to the contact area of the perch and gourd inside the feeder. To hang the feeder, add a small eye hook on top or drill a minute hole for a piece of wire.

    To view more craft projects be sure to stop by our Craft Projects section at Primitive Times Magazine

    This article was written by Angie Wenke owner of Heartland Marketplace, Primitive Times Magazine, Heartland Graphics, Heartland Vintage Graphics

    Friday, March 02, 2007

    You Can Read Our FREE Primitive Times Magazine Online NOW!


    We are always thinking of our readers and just have the BEST NEWS to tell you.

    You can read our FREE Primitive Times Magazine ONLINE NOW!

    That's right! We have an online version.

    Just CLICK HERE or CLICK on the picture of the March 2007 Issue Cover above to see it!

    Isn't that WONDERFUL?

    With the online version that means you can get our FREE Primitive Times Magazine for March 2007 three ways:

    1) Our FREE .PDF Primitive Times Magazine March 2007 E-Zine

    2) Our FREE Primitive Times Magazine March 2007 Online Magazine

    3) Order the PRINT Version and have it mailed to your house. CLICK for more details on ordering our PRINT Version.

    Three ways to get a FABULOUS magazine. Isn't that terrific?

    We hope you like our brand new online version and would love to know what you think about it. Please let us know.


    Copyright © 2007 - All Rights Reserved - Written By Linda Walsh of Linda Walsh Originals, Linda Walsh Originals E-Patterns, and Linda's Blog. Linda is a doll maker and doll pattern designer. http://lindawalshoriginals.com/

    Our March 2007 E-Zine Has Just Been Released and It's FABULOUS!

    The March 2007 FREE Primitive Times Magazine E-Issue was just released and we have to tell you that it's our BIGGEST and BEST issue ever. In fact, it's downright FABULOUS.

    There's a TON of GOODIES inside! And we do mean a TON! And, they are all FABULOUS! We know you're waiting on one foot to hear what's inside so we won't keep you in suspense any longer.


    The FREE March 2007 issue of Primitive Times Magazine (i.e. e-zine) is "Hot Off The Presses!" and ready for for you to download and you're going to love it.

    It's jam packed with 33 pages of terrific information for crafters, small business, and website owners.

    Just look at what's included:

    FREE Patterns

  • Chickie E-Stitchery by Paula of Rusty Pins and Old Lace

  • Primitive Standing Rabbit E-Pattern by Paula

  • Cats In The Barn - LIL Black Cat E-Pattern

  • Love Can't Fall Out E-Stitchery by Vintage Artists

  • Cracked Egg E-Stitchery by Heartland Graphics

  • A Touch Of The Blarney, Easter Egg, and Easter Bunny E-Stitcheries by Olde-Time Stitchins

    FREE Crafting Tips

  • Wax Seal by Renae of Prim Clipper

  • Rusting Items by Debbie

  • It's Bunny Time by Brenda

  • Salt Dough Recipes by Angie Wenke


  • FREE Crafting Ideas and Projects

  • Prim Sheep by Renae

  • Pomander Balls by Renae

  • Easter Decoupage Eggs by Wanda

  • Easy Mason Jar Electric Light by Denise Bailey (aka NeeNee)

  • Getting Creative With Your Kids for Easter - Dyeing Easter Eggs by Lisa Lowell
  • How To Make Prim Grungy Tags by Angie Wenke

  • St. Patrick's Day Shamrocks by Debbie

  • Great Jar Mixes by Angie Wenke


  • FREE Articles

  • A Pupil, A Teacher, and The Crafting Community by Linda Walsh

  • Trademarking: What it Is and Should You Consider It? by Lisa Lowell

  • How To Design a Print Pattern and E-Pattern - Part 2 by Linda Walsh

  • Tips On Opening a Brick and Mortar Store by Nancie

  • Tips On Being A Vendor In a Craft Show by Angie

  • Website Content and Search Engines: Wording Is Key by Lisa Lowell

  • Meet Our Special Sponsor - Talena Bacon by Angie Wenke

  • St. Patrick's Day Dinner by Kassy


  • FREE Graphics and Printables

  • E-Graphics from Paula of Rusty Pins and Old Lace


  • FREE Recipes

  • Making Bread The Easy Way by Paula

  • No Knead Breadsticks by Joan Bruchu

  • Hawaiian Bread

  • Super Duper Cake


  • Product Review

  • Prim Silicone Bulb Shoppe - Reviewed by Angie Wenke


  • Featured Crafter

  • Sheila of The Candle Buzz, Gramma Fran's Attic, Gramma Fran's Fixins, and The Rusty Rooster


  • Front Page Picture Donor

  • Homespun Country


  • Primitive Times Magazine Articles

  • Do You Have A Prim Home? We Want You! by Angie Wenke

  • Sign-Up For CO-OP Ad In Create & Decorate

  • How You Can Be In Primitive Times Magazine! by Angie Wenke


  • It's filled to the brim with wonderful how-to's, ideas and articles. You definitely don't want to miss our BIGGEST issue ever!

    And, you can DOWNLOAD IT RIGHT HERE!


    Copyright © 2007 - All Rights Reserved - Written By Linda Walsh of Linda Walsh Originals, Linda Walsh Originals E-Patterns, and Linda's Blog. Linda is a doll maker and doll pattern designer. http://lindawalshoriginals.com/

    Wednesday, February 21, 2007

    Our Primitive Times Magazine Forum Has Had A Make-Over!!!

    We got an anonymous letter the other day with a strange request. The letter was addressed to "All The Editors At Primitive Times Magazine" and was a request for HELP.

    HELP, we thought?

    Who needed HELP?

    Well, it seems someone felt that our Primitive Times Magazine Forum was in desperate need of HELP. Someone thought it needed a pick-me-up, a fresh-look, a new-dew, new duds, in other words - a make-over.

    Well, we all mulled that over and decided that maybe the forum did need a make-over. Maybe it was run down (although we couldn't understand that as the forum is still pretty new), needed some new duds (or in the forum's case - new graphics), and needed a bright, fresh, cheery and inviting appearance.

    It also needed someone who would always be in the forums corner. Someone to always look out for the forum. Someone to be the "cheerleader." Someone who was creative, imaginative, and just plain "FUN!" We all thought - who better than Lisa? Lisa should be the cheerleader. RAH-RAH Sis-Cum-BAH! CONGRATS, Lisa.

    So, our Primitive Times Magazine Forum has had its' make-over. We've revamped, reshuffled, re-aligned, and re-furbished our Primitive Times Magazine Forum.

    It is now jam packed with new sections, new graphics, new colors, new images, and best of all - IT HAS BLINKIES!!!!. There are so many new features and sections to the forum now that it's hard to tell it all in one post. But, we'll try.

    So, here's our new and/or revamped sections:

    Welcome - We are so glad that you came over and joined us! Please feel free to join in!!!

    What's New - The latest goings-on!

    NEW Contests and Games - We're going to have CONTESTS - Plenty of CONTESTS! Come inside and find the latest Contests and Games to play!

    Prim Chat - Here is where you can chat about any thing that you like!!

    Joke Central - Share a funny email or jokes you have received!

    Movies and TV Chat - Come chat about all your favorite TV Shows and keep up to date on shows you might of missed!

    Photo Corner - Please post and share your family photos in here!

    Blogger Central - Keep us informed on the new stuff going on in your blogs!

    Auction Fun - Do you have auctions going on eBay or Auction Haus, or other auction sites? List your information inside!

    FREE Graphics for our Forums - PLEASE only use the graphics on this message board they are brought to you FREE by Heartland Graphics and Heartland Vintage Graphics.

    Garage Sale Heaven - Do you have craft items or household items cluttering your home? List your items for sale here!**We are not responsible for trades or sales that fall through**

    Freebie Heaven - Who doesn't like freebies! Post those freebies you find here!

    Craft Corner (5 sub-boards) - Wonderful Crafts that we love to make and share!

    a) Tole Painting Crafts - Place your Tole Painting Crafts Inside
    b) Scrapbooking Crafts - Post your Scrapbooking Crafts and Ideas Inside
    c) Country Crafts - Post your Country Crafts Inside
    d) Sewing Crafts - Post your Sewing and Quilting Crafts Inside
    e) Holiday Crafts - Post your Holiday Crafts Inside

    Recipes (6 sub-boards) - Great Recipes that you just have to try!

    a) Appetizer Recipes - Place your appetizer recipes inside
    b) Beverages - Place your Coffee, Hot Tea's, Coco's and Drink Recipes Inside
    c) Crock Pot Recipes - Place your Crock Pot Recipes Inside!
    d) Main Dish Recipes - Place your Main Dish Recipes Inside
    e) Quick Recipes - Place those recipes that take 30 minutes or less inside
    f) Side Dish Recipes - Place your Side Dish Recipes Inside

    Gardening Tips -Post your gardening tips here!

    Sewing Tips and Techniques - Leave your sewing and stitchery tips and techniques here!

    Photo Submission - Do you have a photo you would like to share?

    Staff Cafe - For STAFF only to chat, submit your articles, and share ideas

    Feb. Issue - Let us know what you think about out latest issue and if you would like to see anything added to upcoming issues!

    Our Staff's Sites - Come inside and see all sites of our wonderful staff of editors~ See all the deals and specials they have going on~

    Submit Your Ideas For Issues - Have any great ideas that you would like to see in our next issue! Please feel Free to share it with us!

    Advertising On Primitive Times Magazine - Come inside to learn about advertising on Primitive Times Magazine.

    Leave Your Link - Add your link to your website and/or eBay!

    Sound Off - Post your upcoming sales or specials here! Once weekly please NO SPAM

    Top Sites and Newsletters - Do you offer a FREE topsite or Newsletter?

    Boy, that's a lot.

    We told you it was jam packed.

    So, pop on over to our revamped Primitive Times Magazine Forum and let us know what you think.


    Copyright © 2007 - All Rights Reserved - Written By Linda Walsh of Linda Walsh Originals, Linda Walsh Originals E-Patterns, and Linda's Blog. Linda is a doll maker and doll pattern designer. http://lindawalshoriginals.com