Tuesday, June 24, 2008

How to add an Etsy Mini To your Blog or Myspace


Do you want to help promote your etsy account well a wonderful way to do this is with an Etsy Mini! A Etsy mini is simply a small showcasing of some of your products that you can add to your blog or site itself. Just follow this easy to follow instructions to add your Etsy Mini To your Site today!

1. Log into your Etsy account
2. In the left hand column you will see "Etsy Mini" click here
3. Now you need to choose whether you want to display items you are selling in your shop or items you love. After this you need to choose thumbnail photos or larger gallery views and how big you want your mini by choosing how many rows and columns.
4. After you have chose all of that you will see a box of coding they have created for you, highlight the code by taking your mouse and highlighting all the text and then right click and click on COPY
5. Now log into your site or blog or myspace and add your code and save and you are all done! You have now added a "Etsy Mini" to your site! Hope you get lots of sales!

Resizing your photos for Ebay and Etsy

Have you been looking for ways to crop your photos because they are too large to use for your website, ebay or etsy? And you are just not techincally inclined? Well I came across this great video that will you walk you through the easiest way to crop your photos! Enjoy
Angie

Make your own stamps and prints!


I love coming across cool new tutorial to help my fellow crafters! I came across a great site tonight called Etsy Labs that has great crafting tutorials! Here is just one I wanted to share with you!
Get a block of linoleum from your local craft store and a couple carving tools to go with it! Draw the reverse of the design you want to produce and carve out the spaces you don't want reflected in the stamp:
Click here to finish this great tutorial

Sunday, June 15, 2008

30% OFF All Advertising in July Issue

Get your ad placed in our July Issue right now for 30 % off normal pricing!
Right now you can get

1/8 Ad for only $13
1/4 Ad for only $22
Half Page ad for only $32
Or Full page ad for only $42

Click here to advertise today

Thursday, June 12, 2008

Craft Ideas for Kids - Kids and Pasta

Craft Ideas for Kids – Kids and Pasta


Pasta is not just for tomato sauce. My kids loved pasta for many different art
projects. Next time you find a sale on pasta grab several varieties. Here are
just a few ideas of what kids can make with pasta.


Photo frames - We use either the bow tie pasta or the shell pasta. Start with
thick cardboard. I tend to use white so that we can add any color we want. Your
frame can either be circular or square. Cut out the frame, this is the actual
full size you’ll want at the end. Then cut out the middle to fit the size of the
photo you want to put in there.


Now decide if you want to spray paint the pasta or use food coloring. Gold
metallic spray paint looks great. We have also made various colors of pasta and
made rainbow frames.


If you want to turn your frame into a magnet, add some magnetic tape to the
back.


Necklaces and Bracelets – Penne pasta and macaroni noodles make wonderful
necklaces and bracelets. I suggest using fishing line. It just doesn’t break. As
with the frames, you can use multiple colors of pasta by adding food dye or you
can spray paint the pasta, allow it to dry and then string the pasta onto your
fishing line.


Decorative Jars - Save empty jars. Then fill the jar with an assortment of
shapes and colors of pasta. These jars make pretty decorations for bathrooms,
bedrooms or even end tables.


Pipe Cleaner Figurines - Grab a pipe cleaner. Now arrange pasta on the pipe
cleaner to create people and animals. Mix and match shapes and sizes and then
bend to create almost anything.


Self Portraits - Use spaghetti and linguini. Boil just until soft. Then press
the pasta onto construction paper and into a self portrait. You can also create
landscape scenes using the soft long noodles.


These are just a few ideas of how to use pasta to create great art projects made
by kids.


Article Source:
http://www.wahm-articles.com


Article Written By: Audrey Okaneko is mom to two
girls. She can be reached at audreyoka@cox.net or visited at

www.scrapping-made-simple.com

Thirteen Reasons Why Your Business Needs a Blog

A lot of online business woman
take for granted the benefits a blog has to their business, and a lot of them
choose not to use a blog because they simply can't see the benefit it has to
them and their business.


Well in this article you will learn thirteen very important reasons why your
business needs a blog!


1. Networking - Blogs are a great way to build relationships and networking with
those looking for your services and/or goods.


2. Information - Blogs are also a great way to get information out about the
products or services you sell!


3. Fun - Blogging is a great way to build your business while having fun. Really
it doesn’t even feel like work!


4. Affordable - Sometimes having a blog can be more affordable to get set up
than having a website. 1. Because the Wordpress Blogging platform is free to
install on your own hosting and domain, and 2. you don’t need expensive software
like Frontpage or Dreamweaver to maintain your blog.


5. Easy Maintenance - Using blogging platforms like Wordpress and the like make
it so much easier to add content to your website, through the art of categories
and the like, you can easily organize your content and make it easier for your
visitors to find what they are looking for and therefore encouraging them to
stay and visit for awhile!


6. Friends - While you are networking you can also make friends!


7. Interactive - With blogs you can be more interactive with your visitors by
making posts, asking for comments, and then replying to the comments, all
through your Wordpress admin dashboard! You can’t do that with a “regular”
website!


8. Easy RSS - It is super easy to create an RSS feed with a blog which means
more readers for your blogs!


9. Plug Ins - Plug ins add value to your blog by making it possible for you to
host podcasts on your blog, and even generate Google sitemaps too! With regular
websites you would either need to know alot about javascript, and a whole lot of
code mumbo jumbo, but with Plug Ins all you have to do is intall, configure, and
have fun! So much easier, and so much more fun!


10. More Search Engine Traffic - With the write Wordpress template and plug ins
- your traffic will be streaming in no time at all.


11. Flexibility - With Wordpress you have the flexibility to create posts,
pages, and you even have the control over what appears on your home page (like a
sticky post or even a specific page) which provides you with the flexibility to
either create more of a blogging type website, or a static type website.


12. Community/Partnerships - Wordpress blogs are a great way to create community
blogs! So say you have a team of employees, or business partners, Wordpress
makes the ability to have multiple authors of the blog seamless, which is a
great way for your team to grow their business!


13. Perfect - All around Wordpress is the perfect choice for you and your
business, by giving you the opportunity to communicate with your guests and to
help build strong relationships that will in turn help you grow your business.
No business should be without a blog, period!


Article Source:
http://www.wahm-articles.com


Article Written By:
Heather Bixler is the owner and Lead Designer at
Girly Blog Designz
.

Wednesday, June 11, 2008

My Baby is Growing Up!!!

OK don't laugh! But I had a OLD POOR ME DAY! LOL My daughter turned sixteen two weeks ago but thanks to dear old mom who lost her social security card we had to wait to get her drivers liscense until TODAY! Ok not only am I feeling OLD and everything but you know what today meant! It meant my baby is growing up! UGH

So needless to say I was the proper Mom no crying at the DMV while my daughter is taking her tests! OH No I would not want to embaress my teenager! Mom sat there with tissue hiding in her hand trying not to cry! I am not even joking I saw 7 kids in there getting their drivers licenses and all of us Moms had that look! The look of OH GOD MY Car Insurance rates just jumped through the roof! And OH GOD My baby is NOT a baby anymore! lol lol

The lady next to me her son was in my daughters drivers ed class! She said I guess this means that we have to let them grow a little bit today doesnt it! NOW My insides are YELLING NO NOT MY BABY!! But she was right!!

So after she passed her test and with drivers license in hand we headed home! Where MOM being the pillar of strength that I was (as my knees were quivering) handed over the treasured keys! And said "Katie go have some fun and show off your drivers licenses to some of your friends!" Ok now I just earned myself the "Cool Mom" award right????

Now mind you while she was gone (a whole two hours LOL) I had to call her at least 4 times to make sure she was still alive, the car was in one piece, and that she was behaving! LOL Not too much of a mother hen was I?

So needless to say my daughter made it home in one piece! With drivers license in hand! And a nervously waiting Mom patiently waiting for her! So round one goes to Mom!! Now comes tomorow! She is going to be driving around filling out job applications! MY BABY GETTING A JOB!! Say it isnt so!!

Lord help I need a NICE hot bubble bath! LOL LOL

Tuesday, June 10, 2008

Tattered Star and Crow E-Pattern


In our April 2008 Issue Susan Greer of Cats in the Barn shares with us this great E-Pattern above! Her Tattered Star and Crow! To download this great pattern including instructions and materials lists please visit us by clicking here

String of Stars and Bells E-Pattern May 2008


In our May 2008 Issue Susan Greer of Cats in the Barn shares with us this great E-Pattern above! Her String of Stars and Bells just in time for Fourth of July! To download this great pattern including instructions and materials lists please visit us by clicking here

Star Door Hanger E-Pattern-June 2008


In our June 2008 Issue Susan Greer or Cats in the Barn shares this wonderful E-Pattern above! For the complete pattern including instructions and materials lists please be sure to download the June 2008 Issue by clicking here

Let’s Go Garage Saling!


Let’s Go Garage Saling!

By Laurie Johnson of Prindle Mountain Primitives

With the prices of gas, groceries, and nearly everything else skyrocketing lately, our family is planning to stay close to home this summer. There are still many ways to have fun this summer right here in our hometown, however. A fun afternoon pastime of ours is scouting out garage sales.

If you’re a primitive lover like me, this is a great place to pick up old rusty bread pans or muffin tins. Fill with coffee beans, rosehips, etc., and nestle votives inside.

Also watch for picture frames that can be painted and distressed to hold stitcheries. A friend of mine likes to pair up an old glass candy dish with an antique wine goblet

To read the rest of this article please download our latest edition by clicking here

Six Easy Ways to Increase Your Craft Sales

Six Easy Ways to Increase Your Craft Sales
By: Louise Longworth

Whether you sell your crafts at craft fairs, home parties or another face-to-face outlet, these six easy ways to increase sales will come in useful. I’m definitely not a born sales person, so these tips will help those of you who, like me, don't like to be 'pushy', but still want to maximise your sales.

1. No false modesty

When customers compliment you on your creations, thank them, rather than getting embarrassed and mumbling that actually it’s not that great, anyone could do it, etc. Be proud of your crafts and don’t be afraid to tell people about the high quality and unique features.


2. Honest benefits

Let people know about the benefits of your crafts, especially if they’re applicable to that customer. And if something looks really good on a guest, tell them so! Give them a good reason to buy something for themselves.

As long as you keep it honest, you’re helping your customers, so they won’t mind. The same goes for pointing out matching items or special offers.


3. Touchy feely

Increase your craft sales by letting your customers touch, smell or try on your items if it's appropriate. If I see someone looking at a piece of my jewellery I always encourage them to try it on - they think I'm doing them a favour by letting them wear it, and it's one of the easiest ways to make the sale.

Similarly, if your craft is wearable always wear some samples yourself - it always looks better on a real life model.


4. Make the most of special occasions

If Mother’s or Father’s Day is coming up, remind your customers! Point out which items would make good gifts for these occasions. Make sure you’ve got plenty of Christmas themed crafts on display from October onwards.


5. Good range of prices

Have a good variety of prices, from inexpensive stocking fillers to your top of the range craft item. It’s always a good idea to have a few inexpensive items near you that people can add on at the last minute. If someone is spending £9, they’ll usually be more than happy to add a £1 item on to round it up to £10. Key-rings, bookmarks or greeting cards are some ideas for these, or try fridge magnets with mini versions of your crafts. You’ll find these small amounts add up quickly and make a big difference to your overall sales.

But equally, you should always have a few of your more expensive crafts available. Sometimes a guest is looking for a very special gift for someone and wants to spend a bit on it, and you don't want to miss out on that sale! Having higher priced items also gives an impression of overall quality - you don't want to be confused with cheap imports!


6. Be friendly

This is one of the best ways to increase sales. Just as in any selling outlet, smiling and being friendly is probably the most important thing you can do. If customers like you they’ll be happy to support you, but if you’re hiding in a corner, grumpy and monosyllabic they’ll take their business elsewhere. Wouldn’t you?

Article by:

Louise Longworth works from home selling her handmade jewelry at home parties, and has published a website to help other crafters do the same. Craft-Selling-Parties.com

Craft Ideas For Kids - Kids and Pasta

Craft Ideas For Kids - Kids and Pasta
By: Audrey Okaneko

Pasta is not just for tomato sauce. My kids loved pasta for many different art projects. Next time you find a sale on pasta grab several varieties. Here are just a few ideas of what kids can make with pasta.

Photo frames - We use either the bow tie pasta or the shell pasta. Start with thick cardboard. I tend to use white so that we can add any color we want. Your frame can either be circular or square. Cut out the frame, this is the actual full size you’ll want at the end. Then cut out the middle to fit the size of the photo you want to put in there.

Now decide if you want to spray paint the pasta or use food coloring. Gold metallic spray paint looks great. We have also made various colors of pasta and made rainbow frames.

If you want to turn your frame into a magnet, add some magnetic tape to the back.

Necklaces and Bracelets – Penne pasta and macaroni noodles make wonderful necklaces and bracelets. I suggest fishing line. It just doesn’t break. As with the frames, you can use multiple colors of pasta by adding food dye or you can spray paint the pasta, allow to dry and then string the pasta onto your fishing line.

Decorative Jars - Save empty jars. Then fill the far with an assortment of shapes and colors of pasta. These jars make pretty decorations for bathrooms, bedrooms or even end tables.

Pipe Cleaner Figurines - Grab a pipe cleaner. Now arrange pasta on the pipe cleaner to create people and animals. Mix and match shapes and sizes and then bend to create almost anything.

Self Portraits - Use spaghetti and linguini. Boil just until soft. Then press the pasta onto construction paper into a self portrait. You can also create landscape scenes using the soft long noodles.

These are just a few ideas of how to use pasta to create great art projects made by kids.

Article by:

Audrey Okaneko is mom to two girls. She can be reached at audreyoka@cox.net or visited at www.scrapping-made-simple.com

Craft Barter Exchange To Pay For Services Or Products

Craft Barter Exchange To Pay For Services Or Products

When I started my business I didn't have a big budget for advertising, but it was obviously necessary, so I would seek out other small businesses where I could make contact directly with the owner to discuss the option of paying for advertising not in cash or on credit, but with products of mine to the value of the service.

For example, we have a local A5 booklet dropped in our mail boxes once monthly which is purely advertising - the first half is devoted to home improvement services, and the second half to other local products and services, which I noticed also included advertising for craft and handmade items. I picked up the phone and contacted the company who prints and distributes the booklet, and was pleasantly surprised to find that it was all run by one woman, so we started chatting... I ended up with a full color half page ad which was very successful, and which ended up costing me less than half the full price!

You see, the beauty of barter exchanging your products for services is that you're trading them at their retail value, but that's not what they're costing you to make them!

Craft barter exchanges can be used to pay for many different services which can either help boost your business, such as advertising, or services/products which are just necessary, such as getting business cards printed.

Whether you have the budget for these things or not, always try to negotiate a barter exchange wherever you possibly can - you will save a lot in the long run, which can then be put towards more advertising or promotional activities.

Craft Barter Exchange To Boost Sales

Upselling is a term you should be familiar with (if not, go research it now!) and is usually limited to your own products, but let's do some thinking outside the box...

If you find someone who sells products that are complimentary to yours, they can work well as good incentives for upsells - here's an example:

You have a booth at a craft fair or market, and a customer is admiring your handmade jewelry. She'd really love to go home with your beautiful (most expensive) jeweled necklace, which she knows is going to match her evening gown just perfectly, but she's hesitating because of the price.

You, however, have barter traded with a crafter who makes handmade purses - for just this reason! You approach your prospective customer and suggest that if she'd like to purchase that necklace, you'll also let her have this lovely evening purse which matches the colors of the necklace fabulously... sold!

There are many other examples - offering free fancy gift packaging or handmade greeting cards if the item is being bought as a gift; a free dining table candle if someone is buying handmade napkin rings, or vice versa; even seasonal promotions such as free Christmas tree decorations with something purchased at that time of year.

Use your imagination to find items that are complimentary to yours, and when you introduce the idea of doing a barter exchange with another crafter s/he will probably thank you for sharing the idea too!

Article by:

If you'd like to participate in and benefit from craft barter exchanges, browse our Craft Barter Directory and get listed free!

Summer Rolls with Sweet Chili Dipping Sauce

Summer Rolls with Sweet Chili Dipping Sauce

3 ounces Vietnamese cellophane noodles, cooked according to package directions
2 cups bean sprouts
2 carrots, julienned
1 large beet, julienned
1 fresh red chile, cut in circles
2 handfuls fresh cilantro, hand-torn
3/4 cup chopped unsalted peanuts
2 teaspoons dark sesame oil
1 lime, juiced
Sea salt
20 (8-inch) round rice paper wrappers
40 mint leaves

Put the cellophane noodles, vegetables, cilantro and peanuts in a large bowl; toss with sesame oil and lime juice to give the filling some flavor; season with salt and pepper.

Pour 3 cups of hot, not boiling water in a large shallow bowl. One at a time, immerse the rice paper wrappers in the hot water for 10 seconds to soften, then place on a slightly damp towel. The rice paper is very delicate, don't soak them any longer or they will break apart. Keep them covered while you work to prevent them from drying out and curling.

To form the rolls, lay a rice paper wrapper on a flat surface. Grab a small amount of the cellophane and vegetable mixture and lay it across the bottom third. Use less filling than you think you should, if you overstuff the wrapper it will tear. Carefully fold the bottom of the wrapper up to cover the filling. Fold in the left and right sides, then tuck and roll it over once. Lay 2 mint leaves on top, then tuck and roll it over to close the whole thing up like a tight cigar. The mint leaves should show through the transparent rice paper. Arrange the finished rolls on a platter and cover with a damp towel.

Sweet Chili Dipping Sauce:

1/4 cup rice wine vinegar
2 tablespoons fish sauce
1/4 cup hot water
2 tablespoons sugar
1 lime, juiced
1 teaspoon minced garlic
1 teaspoon red chili paste, such as sambal

In a blender, puree the rice wine vinegar, fish sauce, hot water, sugar, lime juice, garlic, and chili paste until combined. Pour into a small bowl and serve with the summer rolls.

Yield: 1 cup

Saturday, June 07, 2008

Some FREEBIE E-Patterns

These are Free E-Patterns
©Denise Bailey KKL Primitives
Click on Photos to Download Files
Files are in pdf format, you will need Adobe Reader to open them.
http://www.adobe.com/products/reader/
Prim Fabric Sunflowers Tutorial
This tut is for sunflowers only. Directions for making box light are not included. Photo is for display purpose only.


Wooly Sheep Ornie Hanger


Fabric Scrap Prim Easter Eggs

Lighted Jar Lamp


Lighted Jar Lamp

By Denise Bailey

Supplies Needed

cracker jar or similar sized jar

1 set of 35 clear mini-lights

bag of potpourri

rosehips

crocheted or lace doily approx. 15 inches round

large rubber band

1/2 inch wide strip of homespun, 36 inches long

power drill

diamond drill bit

spray bottle of water


To make this lighted jar lamp, I had my husband drill a hole through a large cracker jar that I picked up at a fleamarket for $2.00

To drill a hole through glass, you should always first protect your eyes by wearing some kind of eye protection, like goggles.


You will need a power drill and diamond drill bit. As you are drilling, you must keep the area damp. The reason for this is that grinding glass creates a lot of heat. You need to keep the area that you are drilling wet/lubricated. You can use a turkey baster filled with water or spray bottle of water.


Place a piece of masking tape over the area where you want your hole. Do not place it too close to the bottom of your jar. Place a heavy towel under your jar to cushion it.

When drilling, go very slow and apply light pressure. Your hole only needs to be large enough to fit the wires of your mini-lights through.


After hole is drilled, you will need to remove the plug from the wires so that the wires can be fed through the hole from the inside of the jar. My husband usually just cuts the plug off and replaces it with a new one after he's fed it through the hole.


Here are some instructions on how to replace plugs.

http://www.ehow.com/how_2104146_replace-electric-plug.html

Make sure that the mini-lights are 'loose' in the jar, don't pack it down. Place handfuls of potpourri and rosehips in the jar, shake the jar so that they fall to the bottom, in and around the lights. fill to the top of jar. Don't pack, keep it loose so that your lights will shine through when plugged in.

Cover jar with doily, secure with rubber band. Tie homespun around neck of jar to cover rubber band.


These make excellent gifts and be sure to keep one for yourself!

www.kklprimitives.com


http://theoldecarriagehouse.com/Vendors/sites/AlleghenyPrimitives/

Featured Crafter for June Kristie Norman

Featured Crafter
Kristie & Gary Norman of
Norman's Country Creek
by Denise Bailey


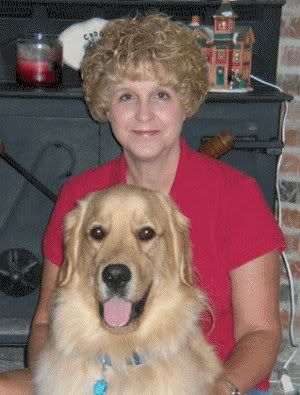
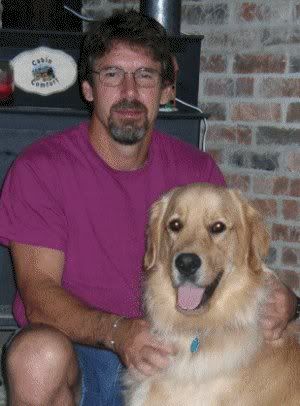
Please tell us a little bit about yourself : Gary and I live in Wabash Indiana. We have 4 children, 5 grandchildren, 2 dogs (one who is a certified pet therapy dog) and an inside bird aviary. We have both taught together in the same elementary school for the past 24 years. I am retiring this year, but Gary will continue for a few more years. He coaches varsity wrestling, and loves beekeeping.


How long has Country Creek been in business?
Country Creek has been in business since 1999. However, our business began to grow when Gary became a beekeeper in 2000. He has about 20 hives and with teaching and wrestling this keeps him extremely busy.


How did you come up with your business' name?
We have a beautiful creek and a small falls running beside our house and we live on a country farm, so Country Creek seemed to be the perfect name. However, I had to name our website Norman's Country Creek, because of the domain name.


Do you sell in other venues?
We attend 9-10 craft shows a year. Our busy season is from September to the end of November. Gary sells his honey/beeswax at local health food stores, school, and customers stop by the house frequently for honey. In past years I have placed products on consignments at local shoppes, particulary my handmade paper note cards.


What kind of products does Country Creek offer to their customers?
I specialize in lamps made from gourds and decanters and lights made from hurricane vases. I have begun making my own lampshades using a very old technique called “cut and pierced.” Since I enjoy painting and making candles, I have combined the two crafts and make painted hurricane candles.

One of the newest products I have online are the oil candle kits. Several customers at our craft shows kept asking why I didn't sell my oil candles on our website. So I decided to offer them as a kit.

Sewing has always been a favorite pastime, so of course I have Raggedy Dolls. I am not a person who enjoys having idle time, so I keep myself busy crocheting in the evening, or during wrestling matches, riding in the car, etc. My grandmother taught me to crochet when I was around 13 and I still use some of her needles and books. I think of her everytime I pick up a new crochet book.
I have always loved to make handmade paper. I hope to add handmade paper note cards in the near future. I sold them for about 5 years, and have had customers requesting them again. I generally make paper from recycled paper, but I have tried making paper pulp from grasses, irises, and certain weeds. I do give paper making demonstrations at local clubs and find it very relaxing to make paper.

Of course Gary offers raw honey in different sizes and beeswax, which is great for a variety of uses.

Are all of your products handcrafted? Yes
Which ones? I make everything but the small tinpunch night lights, and the bases for the Cut & Pierced lamp shades.


What products seem to be your best sellers?
Craft shows and the website are completly different.. The Glass Mini-lamps, and painted hurricane vases are our best sellers at craft shows. However, the best sellers on the website are my raggedy dolls and the painted hurricane globes.

Do you offer wholesale?
I have had lots of requests for wholesale, but haven't decided to offer that option at the moment.

What methods of advertising do you use to promote your shoppe?
I advertise through a variety of online market sites and of course advertise through my own online craft mall site: Honey Creek Market. I am also advertising in the Aug/Sept issue of "Country Sampler" magazine. I always offer discount coupons at all our craft shows.


When sales are slow do you do anything special to try to bring customers in to your shop?
When sales are slow, I try to offer discounts, or reduce shipping costs. But I think the best thing is not to get discouraged, because business will pick up eventually.


Do you have any advice for those who might be thinking about opening an online shoppe?
I have found this business can be very rewarding, yet also time consuming. You must constantly promote, promote, promote and connect with other sites as much as possible. Stay motivated
and don’t give up!


Do you have any advice on what NOT to do?
Don't quit after the first few months, and you MUST advertise. Unfortunately it takes quite a bit of advertising to see a return.


How many hours per day or week would you say you spend working on your crafted products and on your website?
Since I have 2 websites, it takes me about 1 1/2 hours per day on the computer. Now that I am retiring I intend to spend a lot more hours (4 or more) daily working on products, especially my sewing.

Do you have any future plans for expanding your online shoppe? Perhaps opening your own brick & mortar store?
I am thinking about starting another online shoppe sometime next winter. I have a few more ideas, but haven't finalized anything at the moment.


Visit Kristie today at Normans Country Creek just CLICK HERE

Primitive TImes Magazine June 2008 Issue


We have TOTALLY Redesigned our Magazine!
Not only does it look Beautiful! But it has GREAT content too! We are taking ads
for our July issue and we have already filled half of our spots so please please
get your ads in asap! With your July Ad you can include a FREE coupon PLUS get a
Full page on our site with up to 9 product photos if you purchase a 1/4 ad or
larger! So click here to reserve your spot in our beautiful NEW Magazine!
Click here to reserve your Spot today!


Also if you like our magazine and enjoy
it every month consider making a donation to help offset the cost of production!
Just click the button below and donate ANY Amount you want! Thank you


Inside our June Edition


There are TWO Great E-Patterns


A 10 Page Home Tour with wonderful photos


Pages Filled Yummy Recipes


WAHM and Primitive Crafter Business
Advice


Featured Crafter- Kristie Norman


Spotlight Ads


And Sooo much more!


Click to download our
latest edition HERE


Help Promote
Primitive Times Magazine by adding our graphic below to your site and linking it
back to Primitive Times Magazine just click the code in the box and you are all
set!


<a href="http://www.primitivetimesmagazine.com"><img src="http://i162.photobucket.com/albums/t279/primtalk/NEw/PTMmagazinedownload.gif">